

I’m about to share some Canva hacks you’ll love! If you’re a content creator, influencer or any other online business owner, you need eye-catching graphics. Graphics that will help you get your message across, help you develop a relationship with your audience, attract new people and make sales. This can be a stumbling block if you haven’t got a great eye for design or a phd in Photoshop….
Here’s where Canva comes in. Canva is a freemium online tool that helps, even design novices, to create amazing graphics quickly and easily. With no headaches!
You can start from scratch or you can use one of the thousands of templates included and just give them a tweak.
I’ve used Canva for years and I’m actually one of their Certified Creatives. I’ve got a tonne of videos over on my YouTube channel if you want to check them out here’s a list;
- How to create a media kit in Canva
- How to edit templates in Canva
- Getting started with Canva – The basics
- How to make YouTube thumbnails in Canva
- Design 4 optimised social media images in 5 mins with CANVA
- Using Canva & Pages together for awesome content upgrades
- How To Create Infographics with Canva (The Simple & Easy Way)
- How to design your own logo for free
Today I want to share some Canva hacks with you to help you get the most out of this cool tool. You’ll have gorgeous graphics in no time.
Canva Hacks: Tips, Tricks and Shortcuts
Admit it we ALL love a hack! Some of these you might know, but I hope there are a few extras you can start to use after reading this post.
Canva Hack #1: Quick element selection
If you have a design with lots of elements, it can be annoying to find and select the element right at the bottom of the pile. You try to move the other around so you can get access and it all takes too much time.
THE FIX: Select the top element, then hold down COMMAND on a MAC (CTRL on a PC). This allows you to scroll through the elements using the up and down keys.
Canva Hack #2: Finding the free elements
As you probably know Canva offers both free and paid elements. Most people will try to find a good free version, before purchasing one. This can mean a lot of scrolling and searching for the freebies!
THE FIX: In the search bar enter these codes and it will only display the free elements.
“brand:BAAMOuJH0Ec” or “brand:BAAAAP7rQ8M”
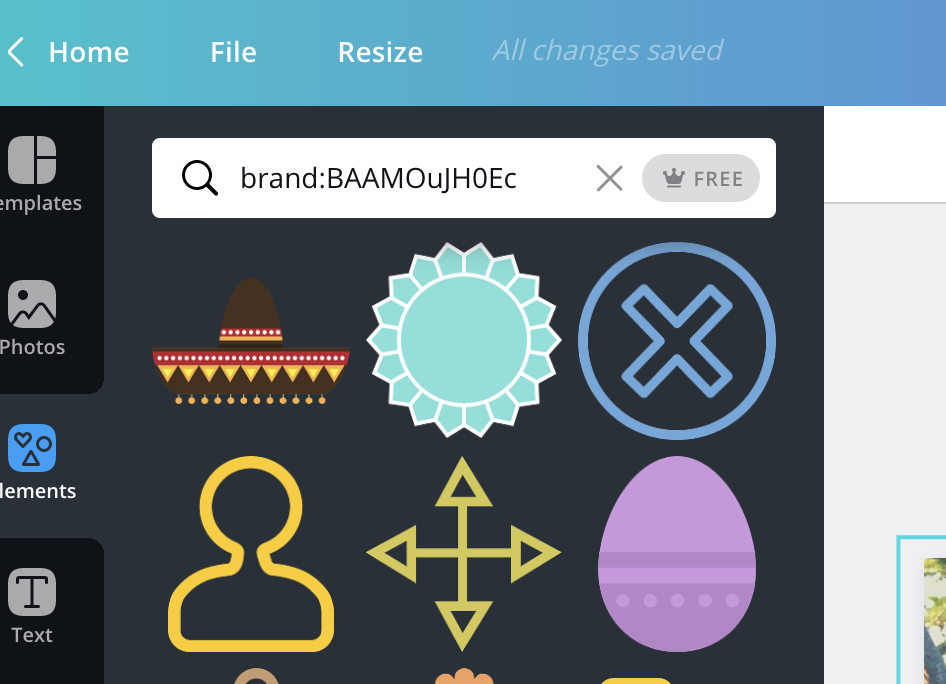
Canva Hack #3: Super speedy text box
O.K. so I know it doesn’t take a long time to scroll over and click the text box. But when you’re super engrossed in creating a masterpiece every second counts, right?!
THE FIX: Just type T on your keyboard and a text box will appear. Magic!
Canva Hack #4: Get inspired by Public Designs
You can choose to make your designs public, but even if you don’t you can still see other people’s public designs.
THE FIX: Select ‘Get Design Inspiration’ from the left side menu and get inspired by other people’s creativity. You can also type in /#design-stream in your Canva URL to see public designs.
Canva Hack #5: Freely move an element
Sometimes the smallest things can be the most annoying! Have you ever tried to move an element a little, but every time you do it moves way more than you intended? Yep, me too!
THE FIX: Hold down SHIFT as you move the element. This disconnects the ‘snap-to-guidelines’ and the element feels free, meaning you can place your element exactly where you want.
Canva Hack #6: Group elements
Aligning groups of elements can be tricky in Canva. Maybe you’re trying to create a table or a vertical row of dots and it can feel painstaking to get them all aligned correctly.
THE FIX: Hold down SHIFT and click on the elements, then you can click Group on the top right and it will group the selected elements. These will then move as one element. You can then duplicate this group and align it underneath. This means fewer elements to align individually.

Canva Hack #7: Quickly undo & redo
So Canva has undo and redo buttons, but if you prefer to use keyboard shortcuts….
THE FIX: Use CTRL (or command) and Z to undo, or CTRL + SHIFT and Z to redo.
Canva Hack #8: Make text more creative
If you have Canva For Work you can upload your own fonts, but you can’t on the free version. However, there’s a way you can use elements to make text more unique.
THE FIX: When using script fonts you can add a flourish (found in the lines section) to the letter to give a fancy look.

Canva Hacks #9: Move elements with arrow keys by pixels
As I’ve mentioned, trying to get things aligned, just right can sometimes be tricky. You want to move the element a fraction and it moves too much.
THE FIX: Use the arrow keys on your keyboard to move an element by just 1px or press SHIFT and the arrow key to move it by 10px (Note: this doesn’t work with text boxes).
Canva Hacks #10: Zooming in and out fast!
The common way to zoom in and out is using the +/- at the bottom right of the screen. However, there is a quicker way.
THE FIX: Press Command or CTRL and the + key to zoom in (tapping + until you get the view you want. Then just press CTRL/Command and – to zoom back out.
Canva Hacks #11: Using Canva frames
If you want to get more creative with your lettering, Canva has some great letter frames available. They work just like a normal image frames, so you can drop in textures, patterns or even photos.
THE FIX: In the search bar type ‘letter frames’ or ‘alphabet frames’. Select the letters you want and then drop in your image to each one.


Canva Hacks #12: Multiple platforms in seconds
This hack is only available to Canva For Work users. Often we create an image for one platform and then we need to recreate it for all the other platforms, so it’s optimized properly for each one. This can be really time consuming.
THE FIX: When you’ve created the first graphic click RESIZE tab on the top menu. On the drop down select the sizes you want (you can select multiple ones). Click the Copy & Resize button at the bottom and a new tab will open for each size you requested. Then you can go into each one are adjust the design.

Canva Hacks #13: Convert text to uppercase or lowercase
If you change your mind and you want to change something you’ve typed in lowercase to uppercase (or vice versa), you don’t have to delete and retype.
THE FIX: Just select all the letters and hit aA key on the top menu.

Canva Hacks #14: Quick text border
When you need to make your text stand out, you can add a border. Instead of having to select a box element and add it, you can use this hack.
THE FIX: Press OPTION + SHIFT + B or ALT + SHIFT + B on windows and a border will automatically be added around your text.
EXTRA TIP: If you want to increase the weight of the border you have round the text. Select the border then press Option (or Alt) + Shift + Equals sign to make the border heavier. Or Option (or Alt) + Shift – Equals sign to make the border lighter.
Canva Hacks #15: Constrain proportions on images
When re-sizing objects in Canva, you can constrain the proportions so your objects don’t become out of shape.
THE FIX: Select the layer you want to work with. Then hold the SHIFT key and drag in the direction you want to scale your image.
Canva Hacks #16: Creating drop shadow text
If you want to create high impact text, you can quickly create drop shadow text in Canva.
THE FIX: Type the text you want. Then when it’s selected click DUPLICATE (top right menu) or CMD + C. You can then change the colour of one of the text boxes and position it slightly to the left or right of the original text box.


Canva Hacks #17: Quick elements
The faster you can create, the faster you can get your message out into the world. There are a number of quick letter shortcuts to help you out.
THE FIX: Simply press R and a new rectangle will appear.
Press L and a line appears
Press C to get a circle
There you have it. 17 quick Canva hacks that will make your life WAY easier. Are any of these new to you? Which Canva hacks are you going to try first?
Disclosure: The links in this post are affiliate links, which means if you make a purchase through the links I earn a small commission. I only recommend tools I love.
Why not pin me for later!

Comments 11
It was perfect the first time. This is very really unique helpful information. I learn so much from you as well! Thank you so much for sharing your helpful information. Keep it up.
Oh Goodness! #5! This alone changed my world. Thank you!
I am using Canva to create PNG’s for my Etsy customers to make waterslides or sublimations. Is there a way to make the DPI 300 while still maintaining the transparent background? I have been downloading a design in canva as a PDF print(to get the 300 PDI)
And then (my husband) put it through a PDF to PNG converter and then changed it back to transparent by hand by clicking on each spot on the image manually to make it transparent. I also need to figure out how to increase the size with out it getting fuzzy.
There are all sorts of people selling transparent PNG’s on Etsy…are they using different software than Canva?
Also is there a way to adjust the size, I have a byer who would like to have the design sized to 5 by 5 inches. It currently is showing at 3.473×3.473 in her Photoshop Elements. She just told me that her design is showing up blurry when she changes the scale from 100 to 130 (as I did to change the size of mine before I printed it)
Not sure if this all makes sense…and thanks in advance for your help.
1. Canva Pro has an option to save anything with transparent background.
2. Resizing is also only available to Pro users, as it’s explained here in Hack#12.
So if you’d like to avoid all that work you described, better to subscribe. Canva Pro is GOLD, in my opinion!
These hacks really helped me. Thank you very much 🙂
Hi – I like the idea of letter frames… but your suggestion isn’t working for me. I only see lots of letter-writing templates when I type ‘letter frames’ into the search bar.
Is this only a Pro feature? I’ve not upgraded yet. Thanks for the useful info!
it’s not a pro feature. I f you scroll down in frames you will find them
Thanks! Do you have a hack or tip how to use different fonts in the same textbox? Using multiple textboxes just doesn’t work for me.
And do you know if there is a way to wrap text around an element? I want to wrap text around a heart, but can’t figure out how to.
Some really great tips here – thanks so much for sharing!
For some reason the quick text border didn’t work…
These hacks are great, but some I can’t find. Are some of these in the PRO version?